MENU
US | USD
-
-
-
-
- Forum Labo 2025
- Advanced Therapies Week (ATW) 2025
- SLAS Europe 2025
- Bioprocessing Summit Europe 2025
- Medlab Middle East 2025
- SLAS International 2025
- Biologics World Nordics 2025
- ASIA LABEX: The Lab Show 2025
- BioProcess International Europe 2025
- ISEV 2025
- Future Labs Live 2025
- Cell 2025
- ASIA LABEX: The Lab Show 2025
-
-
-
-
- Forum Labo 2025
- Advanced Therapies Week (ATW) 2025
- SLAS Europe 2025
- Bioprocessing Summit Europe 2025
- Medlab Middle East 2025
- SLAS International 2025
- Biologics World Nordics 2025
- ASIA LABEX: The Lab Show 2025
- BioProcess International Europe 2025
- ISEV 2025
- Future Labs Live 2025
- Cell 2025
- ASIA LABEX: The Lab Show 2025
US | USD
-
- Benchtop Centrifuges
- Floor-Standing Centrifuges
- Refrigerated Centrifuges
- Microcentrifuges
- Multipurpose Centrifuges
- High-Speed Centrifuges
- Ultracentrifuges
- Concentrator
- High-Speed and Ultracentrifuge Consumables
- Centrifuge Tubes
- Centrifuge Plates
- Device Management Software
- Sample and Information Management
-
- All Pipettes, Dispensers & Automated Liquid Handlers
- Mechanical Pipettes
- Electronic Pipettes
- Multi-Channel Pipettes
- Positive Displacement Pipettes & Dispensers
- Automated Pipetting
- Bottle-Top Dispensers
- Pipette Controllers
- Pipette Tips
- Automation Consumables
- Dispenser & Pipette Accessories
- Automation Accessories
- Dispenser & Pipette Services
Sorry, we couldn't find anything on our website containing your search term.

ISO 8655-6:2022: The High Art of Pipette Calibration
The new checkup protocol for the rockstars in your lab
Rockstars make sure they are well-prepared before they get on stage – running a soundcheck, rehearsing cues, and getting physically prepared for optimal performance during the show. Your rockstars of the lab should be similarly prepared: pipettes, burettes, dilutors, and dispensers. The ISO 8655 builds the operational and regulatory guidance for their checkup. In April 2022, the revised ISO 8655:2022 for piston-operated volumetric apparatus was published, twenty years after the old one. We will show you what to consider!
Read more
Read less

What’s behind the ISO 8655 curtain?
The essential part of your lab rockstar’s preparation is the calibration. The calibration determines whether the pipette still delivers the accurate and precise volumes it is supposed to. If not, the instrument must be repaired. Therefore, regular maintenance and calibration ensure the pipette is performing optimally in accordance with specifications and provide peace of mind to all involved.
The ISO 8655 is an international standard for calibration and testing procedures of piston-operated volumetric apparatus (POVA) like pipettes, burettes, dilutors, and dispensers. It defines the respective criteria and which maximum permissible error limits should be used at each volume tested. In most cases, users decide to use the error limits of the respective manufacturer, which usually are even tighter than the ISO 8655 limits. ISO 8655 criteria include the number of measurements and volumes, controls for room environment, and the permissible quality of the test chain.
Who should do the pipette calibration according to ISO 8655?
- Manufacturers as a basis for quality assurance
- Test laboratories for independent certification
- Users of instruments as a basis for routine verification of accuracy and consistency
Burnouts develop insidiously!
Being the manager of the lab, you know your rockstars best. That’s why you are responsible for determining the calibration frequency, so that pipetting results continuously stay reliable. Worn-out seals and O-rings (for multi-channel pipettes cones) are often not readily apparent. If a pipette fails a calibration "as found", the resulting effort can be huge – starting from checking all analysis results since the last calibration, up to repeating tests.
You determine the pipette calibration intervals
- You must check compliance with the error limits according to the ISO 8655 at least once a year as part of your test equipment monitoring or analytical quality assurance.
- However, you are free to specify shorter intervals and to determine your own acceptable error limits depending on the application and accuracy requirements.
- The frequency of usage, number of users of the device, handling, and the aggressiveness of the liquids to be dispensed play a key role in this decision.
- If the pipette is used for quality-determining steps, calibrations should be performed more frequently.
You choose the calibration method
- Gravimetric test: as a basis for manufacturer's declarations, for independent certificates of conformity
- Photometric and titrimetric tests: as support for quality assurance of the supplier, for routine quality assurance by the user, for repeated testing and testing after repair
Changes in the ISO 8655-6 with impact
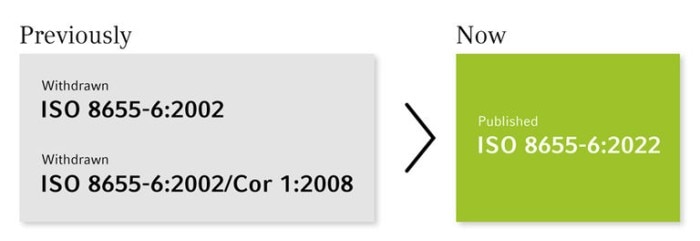
In April 2022, the revised ISO 8655-6:2022 for piston-operated volumetric apparatus was published.
The following changes apply to test protocols under the new ISO 8655-6:2022:
Number of measurements (ISO 8655-6, Chapter 8.1.2)
- For determination the measurement error of a POVA: 10 measurements or more for each volume to be tested shall be performed
Tip exchange during replicate measurement (ISO 8655-6 Chapter 8.3.2)
- Tip exchange at least once to detect the use of damaged or incorrectly manufactured tips and assess the variability of the used tips (for detailed information please read ISO 8655-6 Chapter 8.3.2)
Reporting of results (ISO 8655-6, Chapter 10)
- Test report includes all information necessary for the interpretation of the calibration results according to ISO 8655-6, but without the extended uncertainty of measurement
How to make the soundcheck right
A prerequisite for your rockstars to perform at their best is to follow the ISO 8655 requirements for the calibration process, which also includes the preparation of the “band members” to ensure their tones are in harmony as well:
Test equipment and conditions for calibration
- Pipettes, tips, balance and test liquid acclimated for at least 2 hours
- Calibration lab draught-free with a relative humidity between 45% and 80%, and a reference temperature between (20 +/- 3) °C or (27 +/- 3) °C; +/-0.5 °C during the test or within one hour.
- Balance with a draft shield chosen according to the test volume (ISO 8655-6 Chapter 5.2)
- Weighing vessel with small diameter, lid and an evaporation trap
- Test liquid is distilled or deionized water of quality 3 (ISO 3696)
- Use only original tips (note: error limits always refer to the entire system consisting of pipette and tip)
- Test cycle time to complete the weighing of one delivered volume is kept to a minimum
- Tests procedures are carried out uniformly by trained personnel
Why you should opt for an ISO 17025-accredited lab
Do you require uninterrupted traceability of results for interlaboratory comparisons and compliance with regulations? Our premium quality calibration services in our ISO 17025-accredited labs include calibration certificates with all raw data and the extended measurement uncertainties. We are very happy to support you with these services and are grateful to be able to contribute to your success.
Source: https://www.iso.org/standard/75211.html
Read more
Read more
Read less
